Example Box: MRI artifacts
Introduction
The aim of this example is to become familiar with different structural images and a range of artifacts.
This example is based on tools available in FSL, and the file names and instructions are specific to FSL. However, similar analyses can be performed using other neuroimaging software packages.
See the Getting Started page for instructions about downloading data and running FSL if you are new to either working with a terminal or with FSL.
Please download the dataset for this example here:
Data download
Once it is downloaded, move it to your preferred working directory and unzip it there.
This dataset contains a mixed set of images,
including a range of structural modalities and examples both with
and without artifacts.
Viewing the First Image
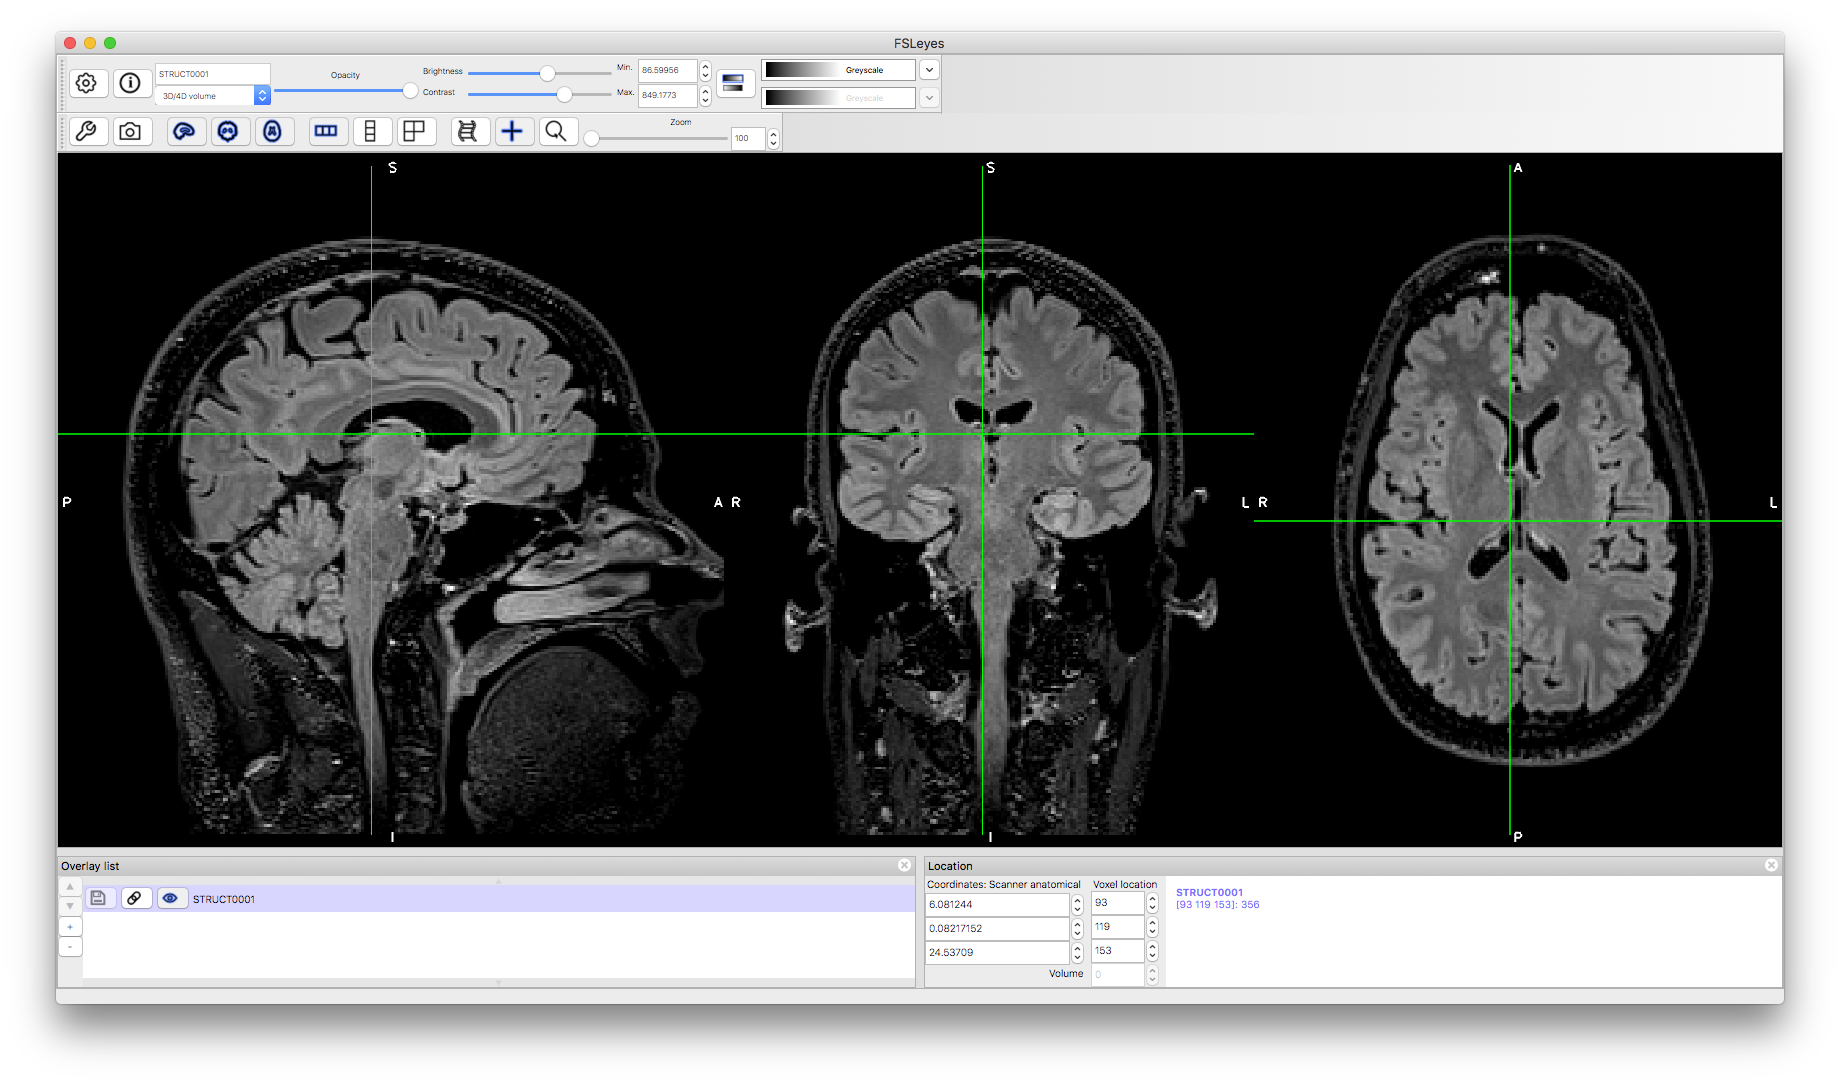
There is a large set of images here, consisting of different modalities and a mixture of images with and without artifacts. The objective here is to get used to viewing images and be able to tell if there are serious artifacts present or not. To start with we will view an image without artifacts: STRUCT0001.nii.gz
Load this image into a viewer (e.g. fsleyes) and inspect it. The image is a FLAIR image (dark CSF plus bright gray matter) and contains a small amount of bias field (certain areas and lighter or darker than others) but nothing that would be problematic for any analyses. Try adjusting the brightness and contract sliders to see the difference in tissues and structures more clearly, especially the deep grey matter structures.
Viewing the Other Images
Now go through and look at each of the other images in a viewer. We recommend using a separate viewing window for each as otherwise the viewer might struggle with the amount of data. Once you've examined an image feel free to close that viewer. In each case look at the image and try to find any artifacts, noting that there will be different contrasts (e.g., T2-weighted, FLAIR, etc.) and different resolutions (e.g., some with quite thick slices). Hence in some cases it will be more difficult to see anatomical structures clearly, but that would not be considered an artifact. The artifacts present in this data cover most of the ones discussed illustrated in the Primer.
For information about the different images click on the name below, but have a look at the image first and make your own mind up before checking here.
- STRUCT0002.nii.gz
This is a T1-weighted image that has a small Field of View (FOV), but is fine for analysis and shows no strong artifacts.
- STRUCT0004.nii.gz
This is a T1-weighted image that has a strong wrap-around in the Inferior-Superior direction, such that some of the signal from the neck overlaps with the superior portion of the brain and therefore this would not be suitable for analysis.
- STRUCT0006.nii.gz
This is a T1-weighted image with very thick slices, which are relatively common for clinical (non-research) purposes. There are no strong artifacts present but this would only be suitable for some types of analysis (e.g., it may be acceptable for registration in a functional analysis, but it would not be acceptable for VBM).
- STRUCT0008.nii.gz
This is a T2-weighted image that has poor contrast and is blurred (due to T2 effects - the details are not important) and so would not be suitable for most analyses.
- STRUCT0010.nii.gz
This is a good quality high resolution T1-weighted image with no major artifacts (it has noticeable bias field, but this is acceptable).
- STRUCT0012.nii.gz
This is a T1-weighted image with no major artifacts.
- STRUCT0014.nii.gz
This is a T2-weighted image with a very limited FOV (Field of View) but no major artifacts. It would be suitable for analysis but a whole brain image would also be required for most analysis pipelines.
- STRUCT0016.nii.gz
This is a T1-weighted image without major artifacts, but where there is a significant rotation of the subject with respect to the imaging axis.
- STRUCT0018.nii.gz
This is a T1-weighted image without a wrap around artifact where the overlap just reaches into the occipital cortex (back of the brain).
- STRUCT0020.nii.gz
This is a T1-weighted image without major artifacts but where the subject had very enlarged ventricles.
- STRUCT0022.nii.gz
This is a T1-weighted image with strong bias field (particularly bright in the posterior portions) but could probably be corrected well with appropriate post-processing.
- STRUCT0024.nii.gz
This is a T1-weighted image with substantial gradient nonlinearity distortion (expansion in the inferior regions), which could be corrected in the analysis pipeline with the appropriate information (details of the scanner's gradient coil parameters).
|
- STRUCT0003.nii.gz
This is a T1-weighted image with a strong RF zipper artifact and would not be suitable for most analyses.
- STRUCT0005.nii.gz
This is a T1-weighted image with a large FOV in the inferior-superior direction, including a lot of the neck, but without any strong artifacts.
- STRUCT0007.nii.gz
This is a T2-weighted image of the same subject as in STRUCT0006, and also shows no strong artifacts, though would only be suitable for some types of analysis.
- STRUCT0009.nii.gz
This is a T1-weighted image with a slightly anisotropic voxel size (0.94x0.94x1.5mm) but would still be suitable for most analyses (though isotropic voxels would be preferable and give less bias and better sensitivity for many analyses).
- STRUCT0011.nii.gz
This is a good quality high resolution T2-weighted image with no major artifacts (same subject and same session as for STRUCT0010). There is a small amount of inferior-superior wrap-around, but the intensity is weak and so will not have a problematic effect.
- STRUCT0013.nii.gz
This is a T1-weighted image with a very strong wrap around artifact. It would not be suitable for analysis.
- STRUCT0015.nii.gz
This is a T1-weighted image with a strong motion artifact. This would not be suitable for most analyses, although it is possible that it would suffice for registration in some pipelines.
- STRUCT0017.nii.gz
This is a T1-weighted image without major artifacts, but where the ventricles are quite enlarged.
- STRUCT0019.nii.gz
This is a T1-weighted image acquired with a very high acceleration that has caused substantial reconstruction artifacts, and so it is unsuitable for use in any analyses.
- STRUCT0021.nii.gz
This is a T1-weighted image with low SNR, and hence is unsuitable for many analyses.
- STRUCT0023.nii.gz
This is a T1-weighted image with motion artifact, and probably unsuitable for many analyses.
- STRUCT0025.nii.gz
This is a T1-weighted image acquired with high acceleration that has caused reconstruction artifacts, particularly poor SNR in the central regions. It would be unsuitable for many analyses.
|
This example should give you some practical experience of what different modalities look like and how to identify a range of artifacts. In practice, when you are starting off and you think there is an artifact in an image then you should bring this to the attention of someone more experienced, who can advise you on the best course of action.